
How to Photograph a Sunset Over Water: Settings, Timing, and Composition
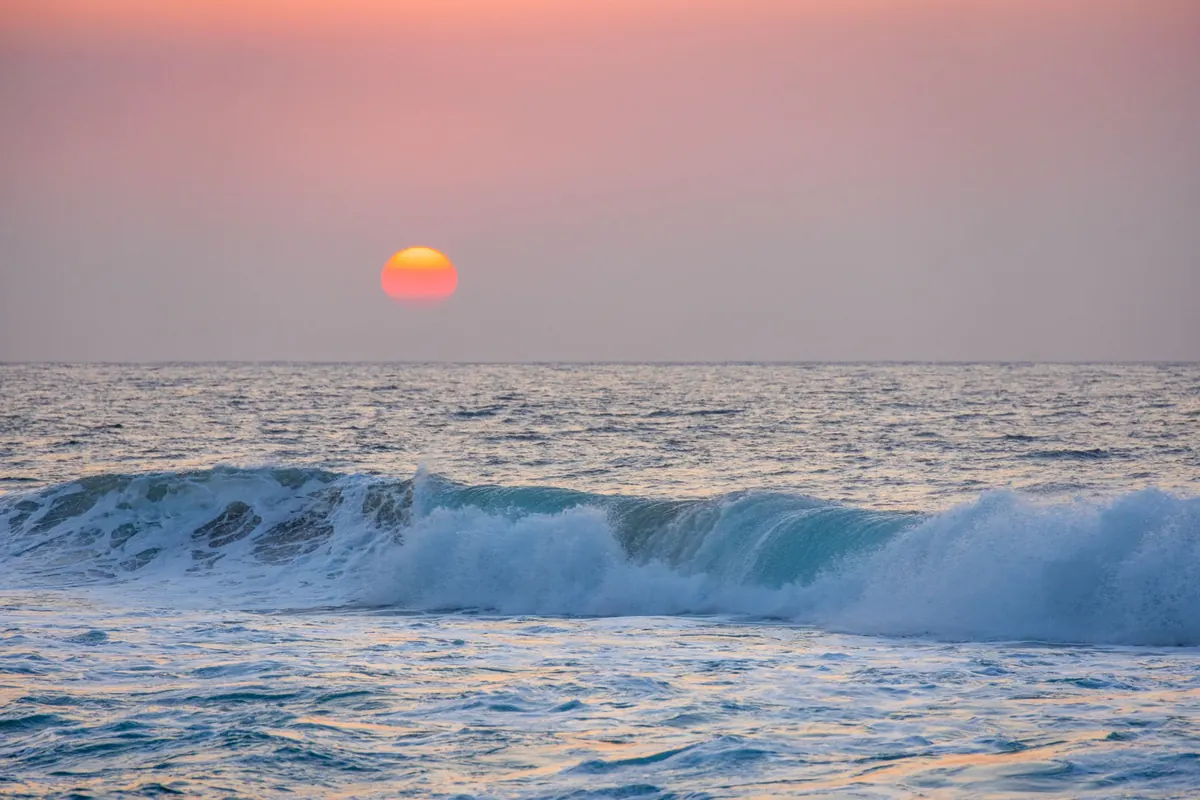
The sky turns, the water takes it, and for maybe eight minutes everything looks like a painting. Then the color drains out and you are standing on a cold beach wondering why the frame you brought home is a white smear above a grey band of sea. Water sunsets are generous with drama and stingy with second chances, but nearly every problem they throw at you has a fixable cause: exposure that trusted the wrong part of the frame, arrival times set by hope rather than by the sun's actual path, and a horizon parked in the middle because that felt safe. Here is how to handle all three.
Read the water before you set up
Sky and water follow different rules. The sky is a light source. Water is a mirror, and how faithfully it mirrors depends entirely on where you stand. High on a cliff, the surface below you often goes dark and matte, reflecting only the flat grey overhead. Crouch to knee height at the shoreline and the same water becomes a second sunset, full of color and bands.
So walk the shore before you commit to a spot. Watch where the bright ribbon of reflected sun lands and whether a breakwater, a rock shelf, or a moored boat cuts through it. Wind matters more than most people expect. In a stiff onshore breeze the reflection shatters into glitter, which is beautiful but painful to expose next to a bright sky. On a still evening the water goes smooth and doubles the whole scene. Both are worth shooting, but they want different pictures.
If you can, plan with a sun-position app rather than guesswork. Knowing the sun's azimuth tells you whether it will drop over open water, slide behind a headland, or run straight down a jetty. Ten seconds of planning saves an hour of standing in the wrong place.
Timing: the window that matters most
Sunset is not a moment, it is an arc that runs from roughly an hour before the sun touches the horizon to half an hour after it disappears. The light at the end of that arc is usually softer and more interesting than the light at the point of contact, and the afterglow — pink high cloud, steel-blue water, the sky finally darker than the sea — is where a lot of the best frames live. It is also when most photographers have already packed up.
A working timeline:
- Sixty minutes out: arrive, walk the shoreline, pick two compositions and note which way you would step if the color develops somewhere unexpected.
- Forty minutes out: tripod up, camera leveled, focus set. This is when you shoot test frames and learn your exposure, not when the sky is on fire.
- Twenty minutes out: the golden stretch. Shoot, then shoot a little more loosely — try a lower angle, a longer lens, a different foreground.
- Sunset and just after: the color compresses into a narrow band. A telephoto earns its keep here.
- Twenty to thirty minutes after: afterglow. Reset your exposure; it is much darker than it looks.
Exposure settings that hold the highlights
This is where water sunsets are won or lost. Your camera's meter sees a huge bright sky and a dark strip of water and averages them into something that satisfies neither. Take control.
- ISO: at or near your camera's base setting, usually 100.
- Aperture: f/8 to f/11 for sharpness across the frame. Stop down to f/16 only when you want the sun as a starburst, and accept a little softness from diffraction.
- Shutter speed: whatever the light allows at that ISO and aperture — often a second or more once the sun is low.
- Format: RAW, manual exposure, Live View with the histogram on.
- Support: tripod, two-second timer or remote release.
Then expose for the sky rather than the scene. Push the brightest clouds as far right on the histogram as they will go without clipping, and leave a little headroom. Highlight warnings help here. With the sun in the frame, part of the sun itself will blow out; that is fine, that is what the sun looks like. What matters is that the clouds around it keep detail and color, because once a cloud is pure white it stays white no matter what you do later.
If contrast is still overwhelming, you have three tools. A graduated neutral density filter darkens the sky and lets the water keep its brightness — the horizon needs to be roughly straight for it to look natural. A polarizer deepens the sky and cuts glare on the water, working strongest at roughly ninety degrees to the sun and barely at all when you shoot straight into it. Or bracket three to five frames and blend them afterwards.
Two small habits that save frames: focus about a third of the way into the scene rather than on the sun, and check your front element every few minutes. Sea air coats glass quickly, and a soft sunset photo is usually a dirty lens, not a focusing error.
Composition: horizon, reflection, foreground
Place the horizon on purpose
A dead-center horizon splits the frame into two halves that argue with each other. If the sky is the story, drop the horizon to the lower third and let the clouds work. If the reflection is the story, raise it and give the mirror more room. Centre works in exactly one situation: a still lake at dusk with a clean doubling, where symmetry is the point.
Watch the tilt
A crooked horizon over water is unforgivable, because the reflection doubles the mistake. Use the grid overlay, switch on the electronic level, or line the horizon against the top edge of the frame.
Give the water something to reflect
A reflection needs contrast to read. A dark rock, a post, a jetty, a boat, a figure at the waterline — any of these turns a pretty gradient into a photograph with a subject. Silhouettes are your friend: expose for the sky and let the foreground go black.
Choose a focal length deliberately
Wide for big skies and sweeping foregrounds. Telephoto to compress the sun against a distant pier or to pick out the narrow band of color at the end of the evening. Shoot both. Walking twenty meters along the shore costs nothing.
If you only remember one thing: meter the brightest cloud, not the whole view.
Small gear choices that save a shoot
You do not need much, but the few items below matter more at the coast than anywhere else. A sturdy tripod, because low light plus water plus long exposures leaves no margin. A microfiber cloth in a pocket, not in the bag. A lens hood to keep stray light and spray off the glass. Something windproof and warm, since shorelines run several degrees colder than the car park. And a tide table — a spot that looks perfect at low water can be underwater, or cut off, within the hour. Treat slippery rocks and incoming surf with real caution; no photograph is worth a twisted ankle or a soaked camera bag.
A five-minute check before you press the shutter
- Is the horizon level, and is it where I want it in the frame?
- Are the brightest clouds short of clipping?
- Is there a subject — a rock, a post, a boat — giving the reflection something to describe?
- Is the lens clean and the tripod locked?
- Have I stayed for the afterglow, or am I leaving too early?
Run that list once, slowly, while the light is still ordinary, and you will spend the eight good minutes shooting instead of fixing. Water sunsets reward the photographer who arrives early, exposes for the sky, and keeps standing there a little longer than everyone else.
Photo: Magda Ehlers / Pexels